Not to be confused with 9-1-1! But this is how we help our MOM remember the recipe.
I do buy some salad dressings, but if I want a simple vinegrette that won't mask the flavors of my actual salad ingredients, then this is what I turn to. It is so simple!
2 - oil (we usually use olive oil, but vegetable oil will do)
1 - apple cidar vinegar
1 - sugar
And add salt and pepper!
This recipe works well with a Tablespoon measurement (2T oil, 1T vinegar and 1T sugar). But we have been known to use a 1/4 cup and double the oil (1/2 cup), then one 1/4 cup vinegar and one 1/4 cup sugar.
This recipe is one of our Grandma Garvin's and certainly a keeper! In the summer when tomatoes are at their best we like to make a salad of baby lettuces, romas and red onion...yum!
If we have Garlic Garni (it's a seasoning) we will add a scant teaspoon to the dressing. Garlic Garni comes from Gilroy, CA...the garlic capital!
Tuesday, December 14, 2010
Sunday, December 12, 2010
Second up...Grandma's Caramels

I don't know about you, but a good caramel is hard to find! Maybe that is why I make them and don't ever buy them. I have tried a few recipes over the years and I keep going back to Grandma's Caramels (this recipe is from my Grandma Garvin). You could also call this No Fail Caramels - unlike the traditional heavy cream caramels that I seem to have trouble with from time to time.
Grandma's Caramels
1 cup butter
1 lb. brown sugar (2 cups packed)
Dash of salt
1 cup light corn syrup
1 can sweet and condensed milk
1 tsp. vanilla
Melt butter, add sugar and salt in heavy pan. Stir in syrup and gradually add milk. Cook and constantly stir over medium high heat until firm ball stage (243-245 degrees). Remove from heat and stir in vanilla. Pour into buttered 9x13 or slightly smaller pan.
Cool and cut.
For wax paper wrappers: I use my fabric cutter to cut the wax paper in 4x5 inch rectangles. Then wrap each caramel individually.
Feels like 3 below...

I have gradually stocked up on butter, sugar, flour and eggs over the last couple of weeks and this is one of the reasons why. Living in Iowa we are bound to have snow and blowing winds of 38 mph gusts and that day is today! Lying in bed this morning, listening to the wind whipping around outside, I thought to myself what shall I bake first? So, I crept down the stairs, trying not to stir anyone, made a pot of Dunkin Dark and began to work. First up...
Vanilla - Almond Sugar Cookies - adapted from Bake at 350. This is not my usual sugar cookie recipe, but the fact that this dough does not need refrigerated intrigued me. They are a little crispier than what I am used to, but the taste...buttery and delicious! They definitely stand alone, as Ellie (my middle) chose to have hers without frosting.
Vanilla - Almond Sugar Cookies - adapted from Bake at 350. This is not my usual sugar cookie recipe, but the fact that this dough does not need refrigerated intrigued me. They are a little crispier than what I am used to, but the taste...buttery and delicious! They definitely stand alone, as Ellie (my middle) chose to have hers without frosting.
Vanilla - Almond Sugar Cookies
3 cups unbleached flour
2 tsp baking soda
1 cup sugar
2 sticks, salted, cold butter
1 egg
3/4 tsp vanilla
1/2 tsp almond extract
Preheat oven to 350.
Combine flour and baking powder and set aside. Cream the sugar and butter. Add the egg and extracts. Gradually add the flour mixture, scraping sides.
The dough will be crumbly. Pat together on a floured surface.
Roll dough out - rather thick. At least a 1/4 inch. Place cookies on parchment lined cookie sheet (I used my Silpat baking mats and they worked great.) Put cookie sheet in freezer for 5 minutes (some of mine were in freezer for longer:) and then bake at 350 for 10-12 minutes.
Let cool on cookie sheet before transferring cooling racks or my marble island.
Friday, December 3, 2010
Christmas Baking - Kid Style
 Maybe not baking...but this is something a 3, 6 and 8 year old can help with!
Here's what you'll need:
Holiday pretzels - the round wreath kind
Almond Bark discs -these were a new find this year
Christmas M&Ms
1. Line the pretzels on a cookie sheet.
2. Fill with 2 or 3 almond bark discs.
3. Bake at 250 degrees for about 5 minutes.
4. Place M&Ms on top of melted almond bark. May need to press down a bit, to help spread the almond bark.
5. Let cool completely and lift off cookie sheet carefully.
We ran out of almond bark and used chocolate chips in the center for some. I have also had these made with Rolo centers and a pecan on top! So many possibilities!
Yep - we're still here!
I want to take this time to reintroduce who we are! We started this blog in the Summer of 2010 and some how puttered out. I don't know, but I think the thing called life got in the way just a bit. So, here's a second go of it...
Becca-- She lives in Southern California with her husband and 7 month old Charlie. Becca teaches part time and enjoys cooking for her family and friends. She likes to try new recipes! And is busy whipping up homemade baby food for her little guy. Maybe we should start a baby food tab? Becca has the pleasure of farmer's markets year round!
Laura - She lives in Seattle (ahh, the food possibilities here!) with her husband. I should say, lives in Seattle when she isn't traveling around the world in search of the perfect macaroon! Laura and Rob love to travel - we'll see if she'll blog about some of her experiences abroad. Laura is our cookie and candy (caramel) expert! She has a knack for making them look as good as they taste. I would venture to say Laura likes to make healtier dinners and maybe even vegetarian main dishes.
Sara -- I live in Iowa with my husband and three children Ben is 8, Ellie is 6 and Anna is 3. I try to cook meals that my family with eat! How frustrating it can be to spend an hour or two on a meal that only two out of five will eat...VERY! But, I also try to get them to try new things! My toddlers are very adventerous eaters, but seem to get less and less the older they are. (I have a notion school lunches don't help!)
Why are we blogging together??
We are sisters who LOVE to cook! We come from a family full of foodies -- some may just like to eat, but a lot of us love to cook and try new recipes. We live far apart, but seem to keep in touch via Skype, phone calls and emails. We want to share our recipes with you, plus we thought this would be a great resource for future generations!
We hope you'll visit our site frequently! Stay tuned for our Holiday Baking Segment.
Monday, August 16, 2010
Chicken Enchiladas

Sundays usually call for a delicious homemade meal that will leave us with some leftovers to last throughout the week. This Sunday, we had a hankering for chicken enchiladas. We ate most of them, but were able to scrape together enough for Pat to take some to work today. Unfortunately, I forgot to take a picture of the enchiladas once they came out of the oven, so this pre-baked picture will have to suffice.
Chicken Enchiladas
2 chicken breasts, meat removed and pulled apart (I used a rotisserie chicken and just used the breast meat and saved the dark meat for Pat - he LOVES it!!)
1 cup chicken broth
1 cup Cacique Crema Mexicana - this can be found in most stores probably in the dairy section. See picture below. Alternatively, you could probably use heavy cream or even cream cheese.
2 oz. diced green chile (I used about half a can)
1 can pinto beans
 Combine all of these ingredients in a pot. Bring to a low boil over medium heat, and then lower the heat to allow everything to simmer until most of the liquid has evaporated. Season this mixture with salt, pepper, and a little cumin.
For the next step, you will need:
lots of shredded cheese
enchilada sauce
tortillas
Spray a 9"x13" pan. Once the chicken mixture has cooled so that you are able to handle it, start to assemble the enchiladas. On a tortilla, put a large spoonful of chicken mixture and a little shredded cheese. Roll it up nice and tight, and lay it seam side down in the dish. Continue until the dish is full. Then, spoon enchilada sauce over the top, and top with lots of shredded cheese.
Bake covered at 350' for about 40 minutes, or until the sauce is bubbling around the edges. Then, remove the foil and hit it with the broiler for just a few seconds, or until the cheese gets nice and bubbly and brown. Let them cool for a good 10 minutes before cutting or tasting, or else you will burn your throat with the sauce (like I did - ouch!!).
Friday, August 6, 2010
Brewing with Brewmaster Steve
Those who have lived in or visited the Pacific Northwest know it is synonymous with microbreweries. Having now lived in Seattle for 10+ years, I've grown to truly enjoy a good beer...or two. I recently spent 2+ weeks back home in Iowa with my family and one of the many things on my list to do while home was to brew a batch of beer with my Dad, aka Brewmaster Steve.
I was tasked with choosing a kit from Northern Brewer's catalog and, after some discussion with my Brewmaster, settled on a Honey Brown Ale. Northern Brewer describes the ale as follows:
Truthfully, they had me at the word "honey" in the name alone.
The cast of characters arrived nicely packaged and ready to be put to work:
 The cast of characters
Once we had our work area set up on the back porch, the first step was to steep our "tea" of specialty grains in 2.5 gallons of water:
 Brewmaster Steve

We let this steep approximately 20 minutes, or until the water reached 170 degrees Fahrenheit. After removing the tea bag, we brought the mixture to a boil and then added the 6 lbs of Gold malt syrup. At this point the mixture is now called "wort" and looks something like this:
 Now we're cookin'
It should be noted here that Brewmaster Steve highly recommends enjoying a past brew (or any beer, for that matter) while hard at work brewing:
 Beer in hand; showering optional
Next was the addition of 1 oz cluster hops. We then returned the wort to a boil, boiled for 60 minutes and finally added the 1 lb (yes, one whole pound!) honey. The next step involves cooling the wort as quickly as possible to approximately 100 degrees Fahrenheit. Since we of the Garvin clan do not own a fancy wort chiller, we opted for the old-fashioned method of an ice bath:
 Ice, ice baby
While the wort cooled, we sanitized the fermenting equipment as well as the yeast pack and scissors to be used to cut open the pack of yeast. We then filled our primary fermenter (a 5 gallon glass carboy) with 2 gallons of cold water and topped it off with our now-cooled wort, leaving any thick sludge behind:
 Hold the sludge, please
More cold water is then added to the carboy to bring the volume to 5 gallons. The yeast pack is then carefully added:
 Brewmistress (brewgirl? brewdaughter?) adding yeast pack
Once the yeast is added, the fermenter is sealed using a rubber stopper and then placed in a quiet, warm, dark spot to allow fermentation to begin:
 Nighty-night, my love
I was tasked with choosing a kit from Northern Brewer's catalog and, after some discussion with my Brewmaster, settled on a Honey Brown Ale. Northern Brewer describes the ale as follows:
"What would happen if you augmented the slightly dry, caramelly and roasty character of a smooth, mellow English brown ale with the sweet floral flavor of clover honey? What if you added the honey at the very last possible minute to maximize its presence in the finished beer? What if it was delicious?"
Truthfully, they had me at the word "honey" in the name alone.
The cast of characters arrived nicely packaged and ready to be put to work:
 The cast of characters
 Brewmaster Steve
We let this steep approximately 20 minutes, or until the water reached 170 degrees Fahrenheit. After removing the tea bag, we brought the mixture to a boil and then added the 6 lbs of Gold malt syrup. At this point the mixture is now called "wort" and looks something like this:
 Now we're cookin'
 Beer in hand; showering optional
Next was the addition of 1 oz cluster hops. We then returned the wort to a boil, boiled for 60 minutes and finally added the 1 lb (yes, one whole pound!) honey. The next step involves cooling the wort as quickly as possible to approximately 100 degrees Fahrenheit. Since we of the Garvin clan do not own a fancy wort chiller, we opted for the old-fashioned method of an ice bath:
 Ice, ice baby
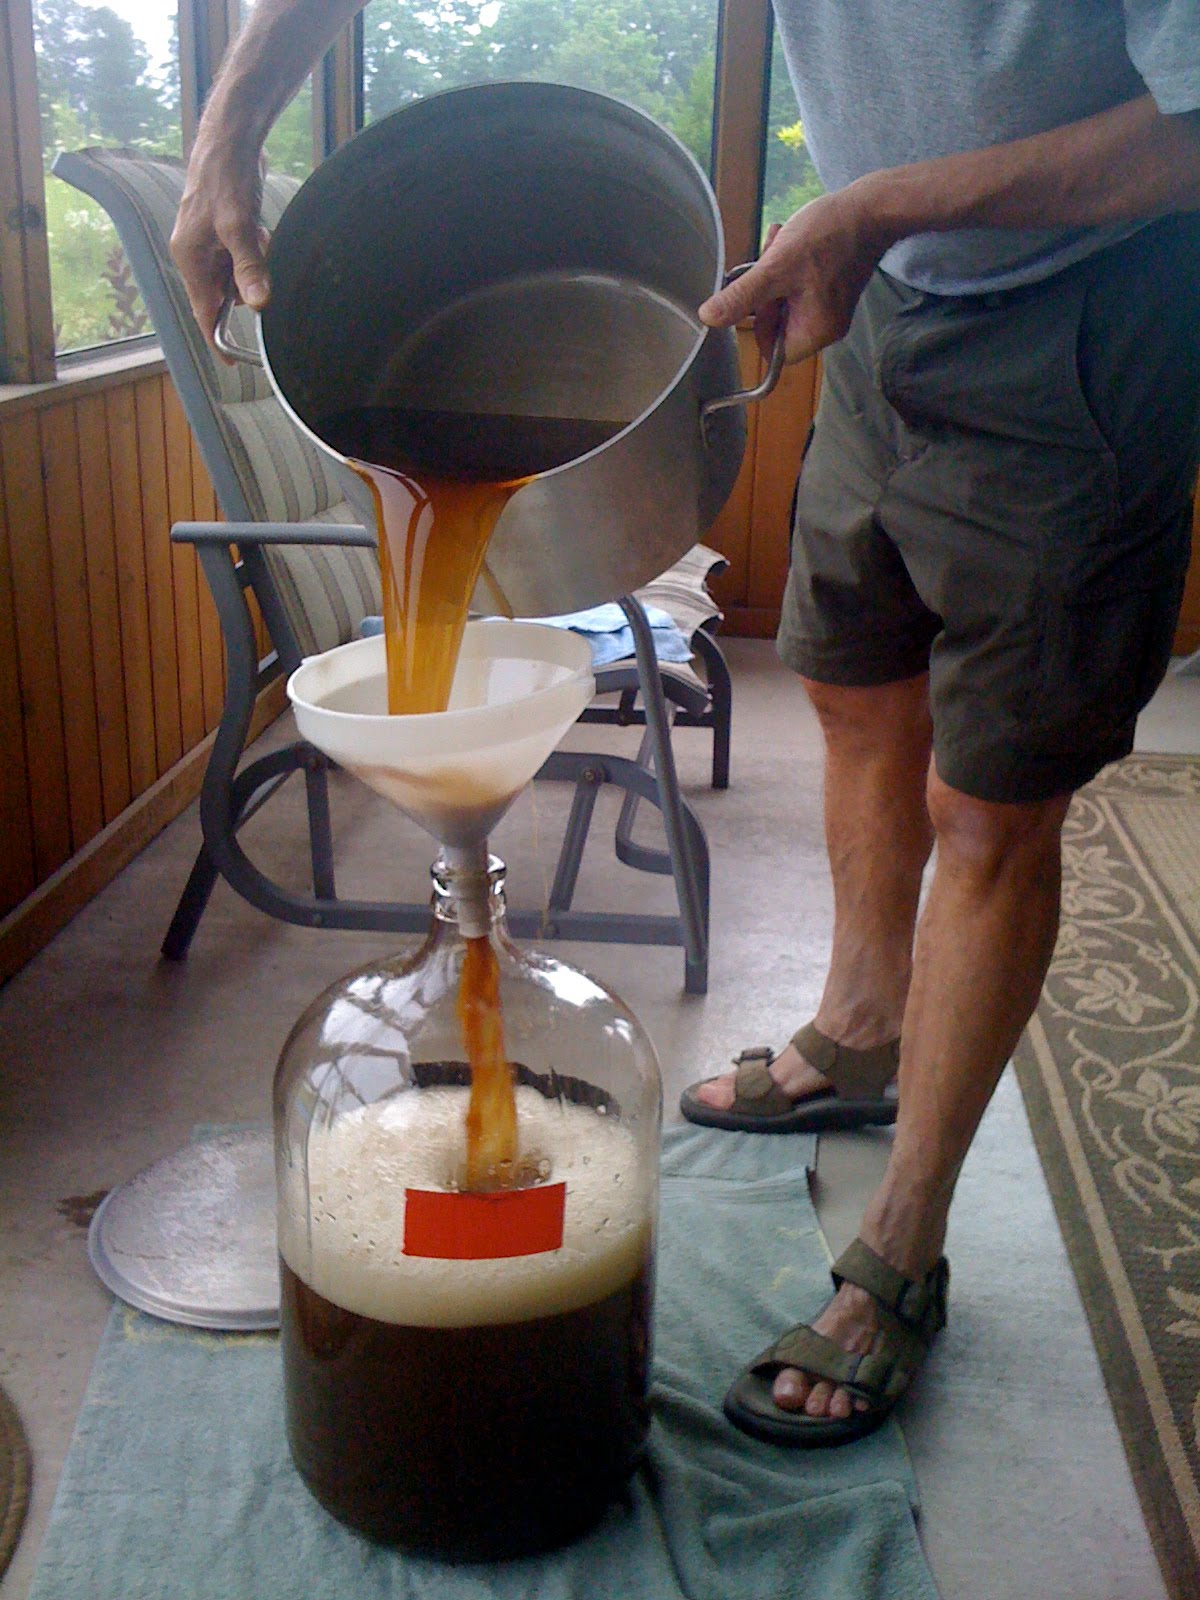 Hold the sludge, please
 Brewmistress (brewgirl? brewdaughter?) adding yeast pack
Once the yeast is added, the fermenter is sealed using a rubber stopper and then placed in a quiet, warm, dark spot to allow fermentation to begin:
 Nighty-night, my love
Active fermentation should have ended approximately 2 weeks after brewing day and, at this time, Brewmaster Steve transferred the beer into a secondary fermenter where it now will continue to do it's thing until bottled in another 2 - 4 weeks. The bottles will then need to condition for 1 - 2 weeks before those puppies can be chilled and enjoyed.
I have to say this day of brewing with my Dad was definitely a highlight of my trip home this summer. As much as I'm looking forward to cracking open one of our Honey Nut Brown ales, the true enjoyment came from spending the day brewing with Brewmaster Steve. Thanks, Dad!
I have to say this day of brewing with my Dad was definitely a highlight of my trip home this summer. As much as I'm looking forward to cracking open one of our Honey Nut Brown ales, the true enjoyment came from spending the day brewing with Brewmaster Steve. Thanks, Dad!
Subscribe to:
Posts (Atom)